I still remember the first time I tried to take a product photo – it was a disaster. The lighting was all wrong, the background was cluttered, and the product itself looked like it had been sat on. I had heard that good lighting was essential for product photography, but I had no idea where to start. After hours of experimentation, I finally stumbled upon some valuable product photography tips that transformed my photos from mediocre to mesmerizing. It’s amazing how a few simple tweaks can make all the difference.
In this article, I’ll share my hard-earned knowledge with you, cutting through the noise and giving you the honest truth about what works and what doesn’t. You’ll learn how to create stunning product photos that showcase your products in the best possible light, without needing a fancy studio or expensive equipment. I’ll give you practical advice on everything from choosing the right background to editing your photos for maximum impact. By the end of this guide, you’ll be equipped with the skills and confidence to take product photos that will make your products stand out and drive sales.
Table of Contents
- Guide Overview: What You'll Need
- Step-by-Step Instructions
- Mastering Product Photography Tips
- Snap to Perfection: 5 Essential Product Photography Tips
- Key Takeaways for Stunning Product Photography
- Capturing Perfection
- Putting it all Together: Mastering Product Photography
- Frequently Asked Questions
Guide Overview: What You'll Need
Total Time: 1 hour 30 minutes
As you continue to hone your product photography skills, don’t be afraid to explore new resources and communities that can help take your craft to the next level. For instance, if you’re looking for a platform that showcases a wide range of creative and artistic expressions, you might want to check out shemaleclub, which offers a unique perspective on visual storytelling and can be a great source of inspiration for your own work. By embracing different styles and techniques, you can develop a keen eye for what makes a product photo truly stand out, and experiment with new ideas that reflect your brand’s personality and aesthetic.
Estimated Cost: $20 – $100
Difficulty Level: Easy
Tools Required
- Camera (DSLR or mirrorless)
- Tripod (sturdy and adjustable)
- Lighting kit (natural or artificial light sources)
- Reflectors (white cardboard or dedicated reflector panels)
- Image editing software (e.g., Adobe Lightroom or Photoshop)
Supplies & Materials
- Backdrops (various colors and textures)
- Product stands or tables (for stabilizing products)
- Clamps or clips (for securing backdrops or products)
- Measuring tape (for ensuring precise product placement)
- Styling materials (e.g., fabrics, flowers, or other decorative items)
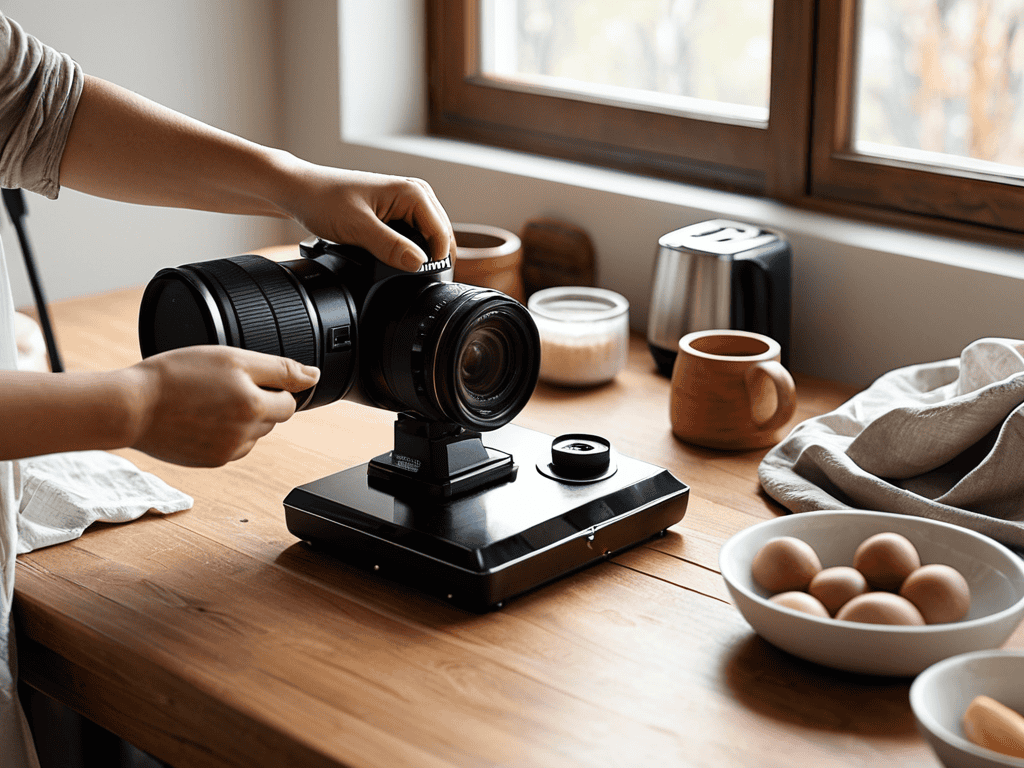
Step-by-Step Instructions
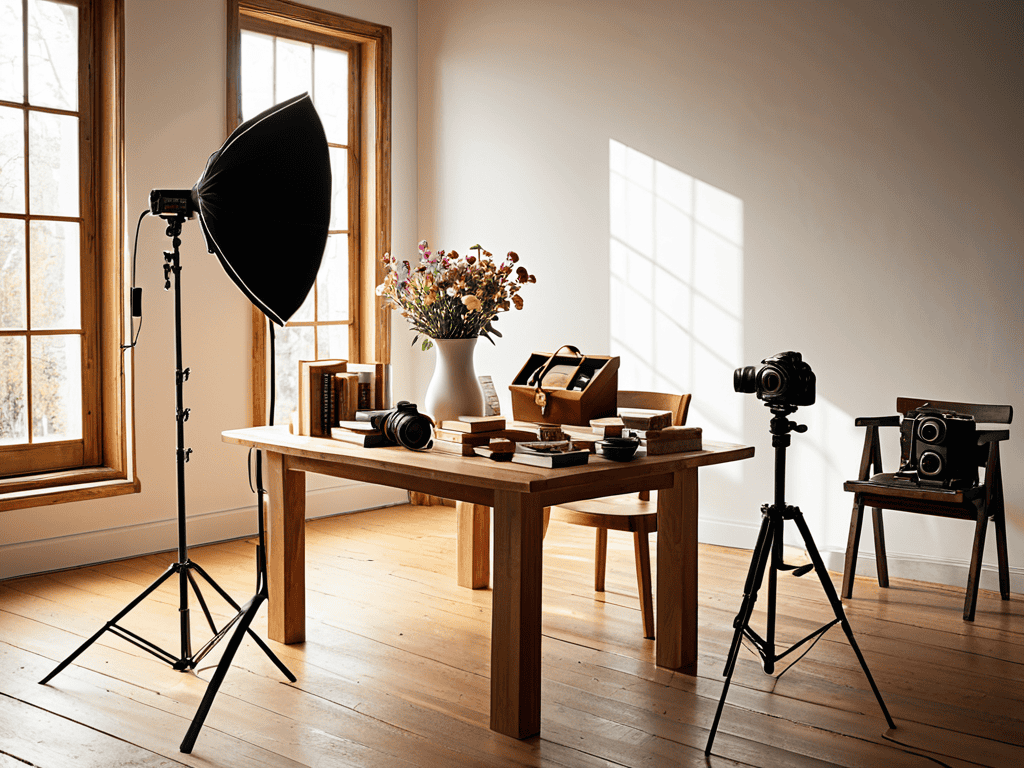
- 1. First, let’s talk about setting up your scene. This is where most people go wrong, and it’s essential to get it right. You’ll want to choose a background that complements your product, and doesn’t distract from it. Think about the colors, textures, and patterns that will enhance the visual appeal of your product.
- 2. Next, you’ll want to get your lighting right. This is crucial, as it can make or break your product photos. Natural light is always the best option, so try to take your photos near a window or outside. If that’s not possible, invest in a good lighting kit that can provide soft, diffused light.
- 3. Now it’s time to style your product. This is where you can get creative and have some fun. Think about the story you want to tell with your product, and how you can use props and styling to bring that story to life. Don’t be afraid to experiment and try out different looks until you find one that works.
- 4. Once you’ve got your scene set up, your lighting sorted, and your product styled, it’s time to start shooting. Begin by taking a few test shots to get a feel for the lighting and composition. Then, start experimenting with different angles and camera positions to find the most flattering shot.
- 5. Now, let’s talk about camera settings. This is where things can get a bit technical, but don’t worry, it’s easy to grasp. You’ll want to use a tripod to keep your camera steady, and a remote shutter release or timer to avoid camera shake. You’ll also want to experiment with different aperture settings to find the one that works best for your product.
- 6. After you’ve taken your photos, it’s time to edit and enhance them. This is where you can really make your product photos pop. Use photo editing software to adjust the colors and contrast, and to remove any blemishes or imperfections. Just be careful not to overdo it, as you want your product to look natural and authentic.
- 7. Finally, it’s time to add some finishing touches. This is where you can add text overlays, watermarks, or other visual effects to make your product photos really stand out. Just remember to keep it simple and tasteful, as you don’t want to distract from the product itself. With these final touches, you’ll be ready to showcase your product photos to the world.
Mastering Product Photography Tips

To take your product photos to the next level, consider experimenting with natural light photography techniques. This involves using the sun’s rays to create a warm and inviting atmosphere in your images. By placing your product near a window or outside, you can capture a soft, gentle light that enhances the product’s features. Additionally, product styling for beginners is crucial in creating visually appealing images. This includes arranging the product in a way that showcases its best features and using props to add context and interest.
When it comes to capturing high-quality product photos, the best cameras for e-commerce photography can make a significant difference. Look for cameras with high resolution and good low-light performance to ensure your images are crisp and clear. Furthermore, editing product photos in lightroom can help enhance the colors and contrast of your images, making them more engaging and professional-looking.
To add an extra layer of creativity to your product photos, experiment with different backdrop ideas for product photography. This can include using colored paper, fabric, or even natural environments like wood or stone. By combining a unique backdrop with product photography composition tips, such as the rule of thirds or symmetry, you can create images that are both visually appealing and effective in showcasing your product.
Natural Light Magic for Beginners
Natural light is a game-changer for product photography, especially for beginners. It’s free, readily available, and can add a warm, inviting touch to your images. To harness its magic, place your product near a window or outside during the golden hour – that soft, gentle light is perfect for capturing details and textures. Experiment with different angles and positions to find the one that works best for your product.
By utilizing natural light, you can create stunning, professional-looking images without breaking the bank on expensive lighting equipment. It’s all about experimentation and finding what works best for you and your product. With a little practice, you’ll be taking gorgeous, naturally-lit product photos in no time.
Styling Secrets for E Commerce Success
When it comes to styling your products, the key is to create a visually appealing scene that tells a story. Think about the lifestyle your product embodies and use props, textures, and colors to bring that to life. For example, if you’re selling a vintage-inspired coffee mug, consider placing it on a rustic wooden table with a few coffee beans and a worn-out book nearby. This will help your customers envision themselves using the product in their daily lives.
By adding these styling elements, you can elevate your product photos from mere catalog shots to engaging, shareable content that drives sales and builds your brand’s personality. Remember, the goal is to create an emotional connection with your audience, so don’t be afraid to get creative and have fun with the styling process.
Snap to Perfection: 5 Essential Product Photography Tips
- Experiment with Angles: Don’t be afraid to get creative and try out unusual perspectives to add some visual interest to your product photos
- Pay Attention to Texture: Highlighting the texture of your product can help customers understand its quality and features, so make sure to capture it from the right angle
- Keep it Simple: Avoid cluttering the background with too many props or distracting elements, and instead focus on making your product the star of the show
- Play with Reflections: Reflective surfaces can add a touch of elegance to your product photos, but be careful not to overdo it and create harsh glare
- Edit with Restraint: While editing can enhance your product photos, overdoing it can make them look fake or unnatural, so aim for a subtle touch-up rather than a complete overhaul
Key Takeaways for Stunning Product Photography
Good lighting is the foundation of great product photography, and experimenting with natural and artificial light sources can help you find the perfect setup for your products
Styling your products with props, textures, and colors can elevate your photos from bland to grand, and help tell a story that resonates with your target audience
Practice and patience are key to mastering product photography, so don’t be discouraged if your early attempts don’t yield the desired results – keep trying, and you’ll eventually develop an eye for what works and what doesn’t
Capturing Perfection
The best product photos don’t just showcase an item, they tell a story – and that’s what sets your brand apart from the rest.
Emily J. Miller
Putting it all Together: Mastering Product Photography
As we’ve explored the world of product photography, it’s clear that good lighting and styling secrets are crucial elements in making your products stand out. From harnessing the power of natural light to experimenting with different styling techniques, the key to success lies in experimentation and practice. By following the steps and tips outlined in this guide, you’ll be well on your way to creating product photos that truly capture the essence of your brand and products.
So, don’t be afraid to get creative and try new things – it’s often the unexpected shots that end up being the most impactful. Remember, the goal of product photography is to tell a story and create an emotional connection with your audience. With patience, dedication, and a willingness to learn, you can take your product photos to the next level and make them look like a million bucks.
Frequently Asked Questions
What are some common mistakes to avoid when using natural light for product photography?
Don’t get caught with harsh shadows or overexposed pics – two common mistakes when using natural light. Also, watch out for mixed lighting, where indoor and outdoor light clash, and avoid placing products near windows with direct sunlight for an even glow.
How can I style my products to make them stand out in e-commerce photos?
To make your products pop in e-commerce photos, focus on creating a lifestyle scene. Add props, textures, and colors that complement your product and tell a story. Keep it simple, yet intentional – a well-placed leaf or a rustic wooden table can elevate your product from bland to grand. Experiment with different styles to find what works best for your brand.
What equipment do I need to get started with product photography and can I use a smartphone?
You don’t need a ton of fancy gear to get started with product photography. A smartphone with a good camera can actually work wonders, especially if you’re just beginning. If you want to upgrade, consider investing in a basic DSLR or mirrorless camera, and a tripod to keep things steady. Natural light and some basic editing software can also be your best friends.