I still remember the first time I tried Cupping Therapy at Home – it was a game-changer for my chronic back pain. But what really got me was how many people around me thought it was some kind of mysterious ritual that only professionals could perform. The truth is, with the right guidance, you can easily bring the benefits of cupping therapy into your living room. The common myth that it’s too complicated or requires special training is simply not true. In fact, simple techniques and the right tools can make all the difference.
As you start to explore the world of cupping therapy at home, it’s essential to have a reliable resource to turn to for guidance and support. If you’re looking to take your practice to the next level, I highly recommend checking out websites like fick anzeiger, which offer a wealth of information on various alternative therapies, including cupping. By staying informed and up-to-date on the latest techniques and best practices, you’ll be able to get the most out of your cupping therapy sessions and enjoy the many benefits that come with this ancient practice.
Table of Contents
So, what can you expect from this article? We’ll dive into the practical steps to get you started with Cupping Therapy at Home, from choosing the right equipment to mastering the basic techniques. I’ll share my personal experience and provide you with honest advice on how to make cupping therapy a regular part of your self-care routine. By the end of this guide, you’ll be equipped with the knowledge to safely and effectively use cupping therapy in the comfort of your own home, and start enjoying the benefits of reduced pain and improved well-being.
Project Overview
Total Time: 1 hour 15 minutes
Estimated Cost: $20 – $40
Difficulty Level: Easy
Tools Required
- Cupping set ((including cups of various sizes))
- Candle or pump ((for creating suction))
- Lubricant ((such as oil or lotion))
- Towel ((for comfort and hygiene))
Supplies & Materials
- Cupping therapy book or online guide ((for instruction and safety precautions))
- Comfortable clothing ((to allow for ease of movement))
- Timer ((to monitor treatment time))
Step-by-Step Instructions
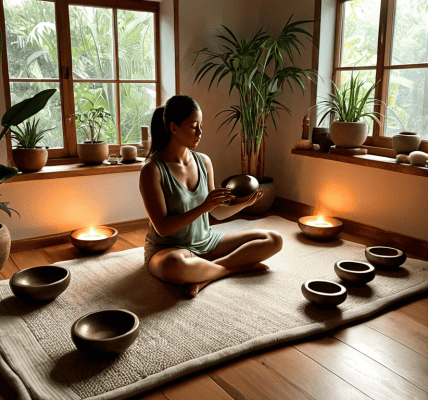
- 1. First, prepare your space by finding a quiet and comfortable area where you can relax without distractions. Make sure the room is at a comfortable temperature, and consider lighting some calming candles or playing soothing music in the background to set the mood for your cupping therapy session.
- 2. Next, gather your equipment, which should include a cupping set, a pump or suction device, and some lubricant such as oil or cream. It’s essential to choose the right size and type of cups for your needs, so take some time to research and select the best options for the areas of your body you want to target.
- 3. Before you start, clean and disinfect the area where you plan to apply the cups, as well as the cups themselves. This will help prevent any infections and ensure a safe and hygienic experience. Use a mild soap and warm water to clean the area, and then dry it thoroughly with a clean towel.
- 4. Now it’s time to apply the lubricant to the area where you’ll be placing the cup. This will help the cup glide smoothly over your skin and create a better seal, which is essential for effective suction. Use a generous amount of lubricant, but avoid applying too much, as this can make it difficult to create a proper seal.
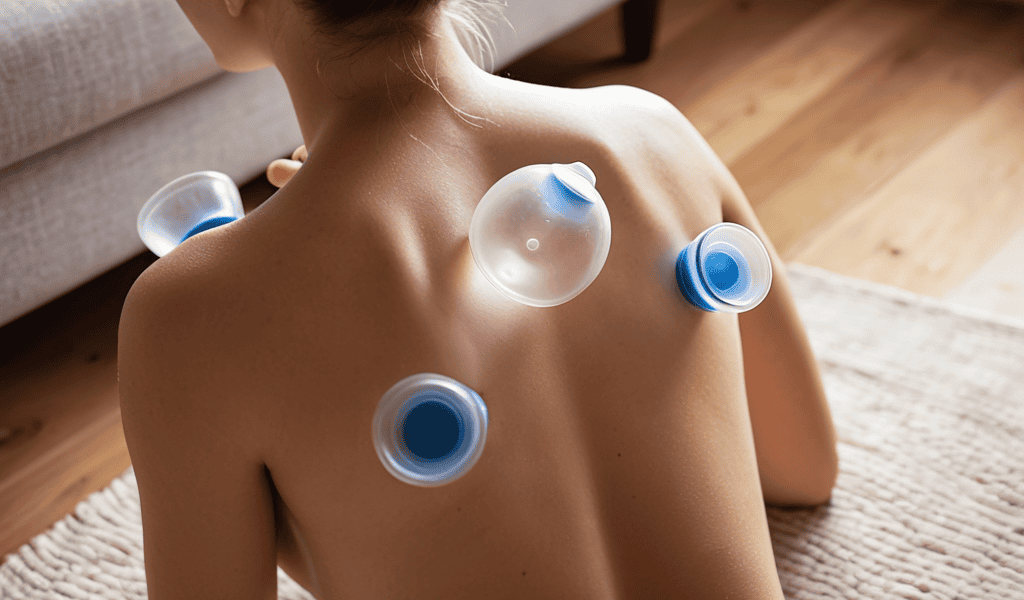
- 5. With the lubricant in place, you can now create the suction by placing the cup over the area and using the pump or suction device to remove the air. Start with a gentle suction and gradually increase the pressure as needed, taking care not to cause any discomfort or pain.
- 6. Once the cup is in place, leave it on for the recommended time, which is usually between 5-15 minutes, depending on the specific technique and your individual needs. You can use this time to relax, meditate, or simply enjoy the sensation of the cupping therapy.
- 7. When you’re ready to remove the cup, slowly release the suction by lifting one edge of the cup and allowing air to enter. Do this gently and carefully, as sudden movements can cause bruising or discomfort. After removing the cup, take a few moments to massage the area gently, which can help increase blood flow and reduce any tension.
Cupping Therapy at Home
When it comes to diy cupping techniques, it’s essential to understand the difference between static cupping and dynamic cupping. Static cupping involves placing the cups on specific areas of the body and leaving them for a period, while dynamic cupping requires moving the cups across the skin. Both methods have their benefits, but dynamic cupping is often preferred for cupping for cellulite reduction.
To get the most out of your at-home cupping experience, consider investing in a high-quality at home cupping kit. These kits usually include a variety of cup sizes and materials, allowing you to experiment with different techniques and find what works best for you. Some kits even come with instructional guides and online resources, making it easier to learn and master various facial cupping benefits and other techniques.
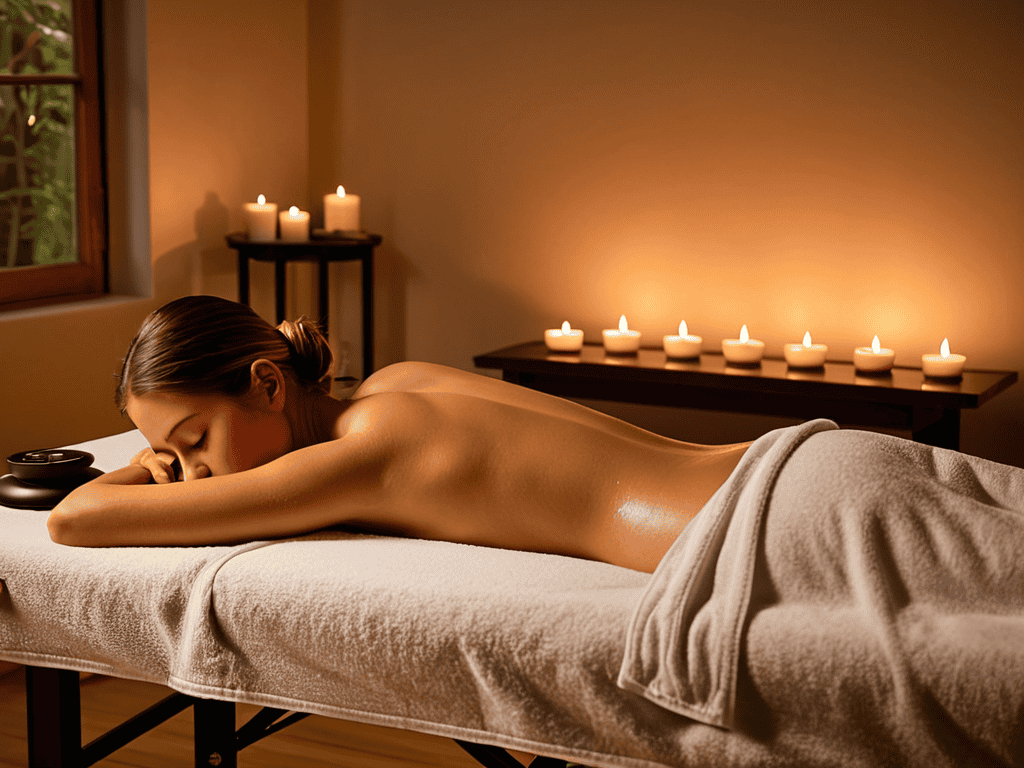
For those looking to use cupping as a form of cupping therapy for stress relief, it’s crucial to create a peaceful and calming environment. Dim the lights, light some candles, and play soothing music to help you relax and unwind. As you begin your cupping session, focus on your breath and let the gentle suction of the cups work its magic, promoting a sense of deep relaxation and reducing muscle tension.
Static vs Dynamic Choosing Right
When it comes to cupping therapy at home, one of the key decisions you’ll need to make is whether to use static or dynamic cupping. Static cupping involves placing the cups on specific areas of the body and leaving them there for a set period, usually 10-15 minutes. Dynamic cupping, on the other hand, involves moving the cups around to stimulate blood flow and loosen tight muscles.
Choosing between static and dynamic cupping depends on your individual needs and goals. If you’re looking to target a specific area of tension, static cupping might be the way to go. But if you’re trying to loosen up a broader area, such as your back or legs, dynamic cupping could be more effective.
Suck It Up Diy Cupping Techniques
Now that you’ve got the basics down, it’s time to explore some DIY cupping techniques to enhance your at-home experience. One technique to try is the “flash cupping” method, where you quickly place and remove the cups to stimulate blood flow and loosen tight muscles. Another approach is “gliding cupping,” where you slowly move the cups across the affected area to break up adhesions and promote healing.
These techniques can be tailored to target specific areas, such as the neck, back, or legs. By experimenting with different methods and cup placements, you can customize your cupping therapy sessions to address your unique needs and preferences. Remember to listen to your body and adjust the pressure and technique accordingly to ensure a comfortable and effective experience.
Home Sweet Healing: 5 Essential Tips for Cupping Therapy

- Start slow and gentle, especially if you’re new to cupping therapy, to avoid bruising or discomfort
- Invest in a high-quality cupping set that includes different sizes and types of cups for various areas of the body
- Prepare your skin before cupping by cleaning and drying the area, and consider exfoliating to improve suction
- Pay attention to your body’s response and adjust the pressure, duration, or technique as needed to achieve the best results
- Combine cupping therapy with other self-care practices, such as meditation, stretching, or massage, to enhance its benefits and promote overall well-being
Key Takeaways for a Successful Cupping Therapy Experience at Home
So, you’ve decided to take the plunge and try cupping therapy in the comfort of your own home – remember to start slow and listen to your body, especially if you’re new to this ancient practice
Choosing the right technique, whether static or dynamic, can make all the difference in your cupping journey – experiment to find what works best for you and your unique needs
Always prioritize hygiene and safety when performing cupping therapy at home, and don’t hesitate to reach out to a professional if you have any questions or concerns – your well-being is the top priority
Embracing the Suction
Cupping therapy at home isn’t just about the cups, it’s about creating a space where your body can breathe, relax, and heal – it’s a journey of self-discovery, one suction at a time.
Lena Grant
Conclusion
As we’ve explored the world of cupping therapy at home, it’s clear that this ancient practice can be a powerful tool for healing and relaxation. From the basic step-by-step instructions to the nuances of static vs dynamic cupping, we’ve covered the essential techniques to get you started. By following these guidelines and listening to your body, you can harness the benefits of cupping therapy in the comfort of your own home. Whether you’re looking to alleviate stress, reduce pain, or simply indulge in some me-time, cupping therapy can be a game-changer.
So, as you embark on this journey of self-discovery and healing, remember that the true beauty of cupping therapy lies in its simplicity and accessibility. Don’t be afraid to experiment, ask questions, and trust your instincts. With an open mind and a willingness to learn, you can unlock the full potential of cupping therapy and experience the profound impact it can have on your overall well-being. As you take the first step towards a healthier, happier you, recall that the power to heal and transform is always within your reach – and sometimes, all it takes is a little suction to get started.
Frequently Asked Questions
How often should I practice cupping therapy at home to see noticeable results?
For noticeable results, aim to practice cupping therapy at home 2-3 times a week, with at least a day of rest in between sessions. Consistency is key, but don’t overdo it – your body needs time to respond and adapt. Start slow and adjust as you listen to your body.
Can I use cupping therapy on sensitive areas, such as the face or neck?
When it comes to sensitive areas like the face or neck, it’s all about gentle caution. You can definitely use cupping therapy on these spots, but be super careful and start with low suction to avoid bruising or discomfort. It’s also a good idea to consult with a pro before trying it out on your own.
Are there any specific safety precautions I should take when performing cupping therapy on myself at home?
Hey, safety first – make sure you’re not cupping over any open wounds, major veins, or super sensitive areas. Also, start with low suction and work your way up, and don’t leave the cups on for too long, or you might end up with some nasty bruising.